 Lost & Found
 Chalk
Chalk Keys to my Heart
 Cozy
Cozy Journey Through Parenthood
 Blue Sky Holiday
 Queen of my Heart
 Welcome Spring
 Self Proclaimed Princess
 Princess Cupcake Face
 Love You
 Light up my Life


 Lost & Found Chalk Keys to my Heart Cozy Journey Through Parenthood Blue Sky Holiday Queen of my Heart Welcome Spring Self Proclaimed Princess Princess Cupcake FaceLove YouLight up my Life
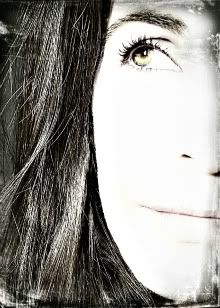
 I'd like to leave you with a little more inspiration. This is my daughter this past summer trying out her twirly dress. Love it.
 Adore the ZVA rose blossoms - every color and every size you can imagine!
 Of course there's the two toned crystal flourishes to compliment the warm tones in the papers - which are Bo Bunny's Noel Collection (who'd have thought you could do a summer layout with winter papers eh?)
 Thanks so much for the visit and for participating in the hop!! Stay tuned in the next few days for some more scrappy goodness. Cheers!
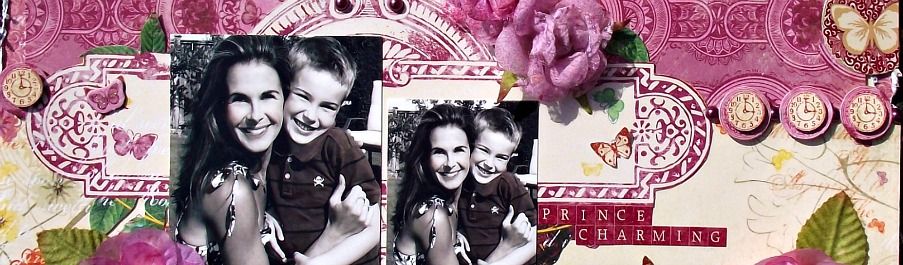
 This month, my colour is purple!! I used the beautiful new purple pearl flourishes from ZVA as well as their butterfly flourish which I inverted.
 You can see here where I used the rest of the butterfly flourish, paired with another black butterfly from a previous project that I saved. In addition, I used some of ZVA's crystal alphas for my title and some of their larger purple pearls for the centres of my chipboard blooms.
 The Winter Joy papers from Bo Bunny had the perfect accents for this project and hilighted the purple tones perfectly!
 The blog hop begins here: Kim Hughes
Your next stop is at the blog of Ingrid Danvers
Thank you SO MUCH for joining us.
ZVA Supplies:
Self Adhesive Crystal: CRB03CB112
Self Adhesive Pearl: PES03CB107
Sefl Adhesive Pearl: PEW03CB154
Self Adhesive Pearl: PEW03CB142
Self Adhesive Crystal Alphas: CRB02CB112
Self Adhesive Crystal: CRB03CB109
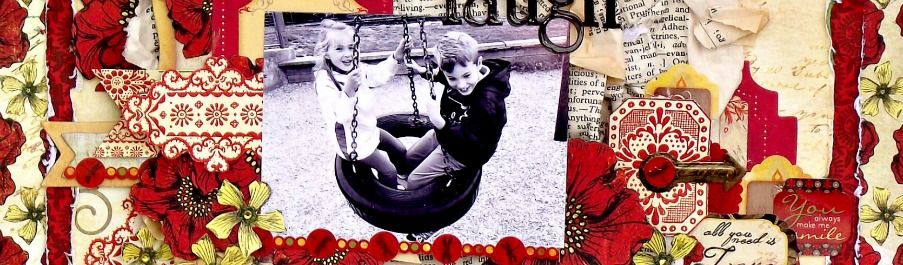
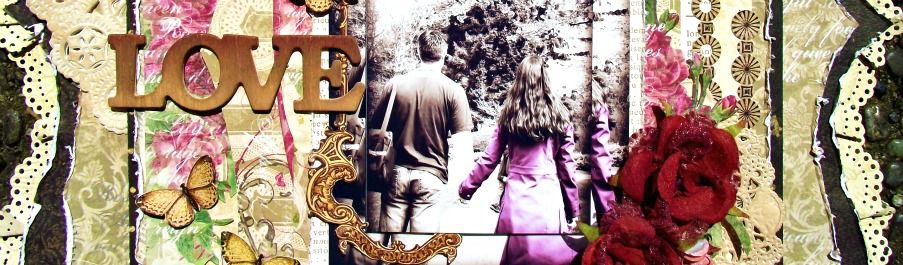
 My first layout is quite simple in design. I love the pops of colour from my daughter's jacket and wanted to enhance this with some blooms. You can see how well the flowers and red swirls stand out with such an otherwise monotone background. Love this.
 I'm all about making the products work for me and I'm not afraid to alter each product to suit my needs. The kit comes with some beautiful fabric flowers that I just didn't feel worked well with my layout. I took apart the flower and used the fabric petals to layer on the top of my page for added softness and dimension.
 I made my own roses with the beautiful patterned papers and finished with some XMas Red Distress stickles - also in the kit. (NOTE: The leaves were not included in the kit)
 I used very few embellies aside from my flowers as I felt they pretty much dominated the page (LOL). I fussy cut this photo frame, the bird and the birdcage from another piece of patterned paper and finished with some Diamond Glaze (also in the kit).
 There was a gorgeous piece of crystal bling in the kit - much too elegant to use on any one area of my project. I cut it (totally hacked it actually) into several smaller pieces and used throughout my layout.
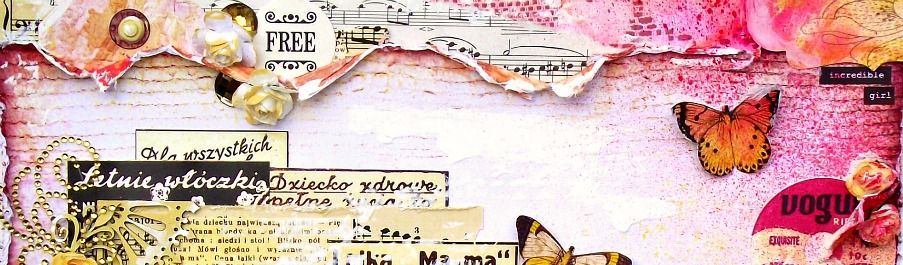
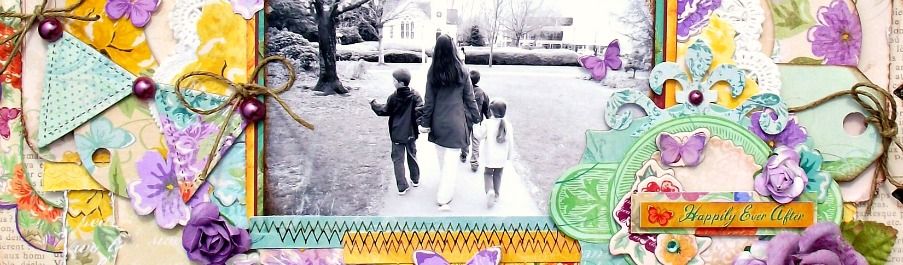
 Layout number two! I love how this came together in the end. It actually took me AGES to get the composition just right and I actually thought that I had wrecked it initially. But you know what they say - 'there is no such thing as a mistake in scrapbooking - just an opportunity to embellish' - HA!
 To create my vintage blooms, I first inked the lace included in the kit and then stitched them together. I finished with the gorgeous pearl brads. The petals were created using the unique feathers in the kit - very cool addition and the tones work wonderfully with the papers!
 LOVE layers - this page is nothing short of TONS of them! I made a unique heart banner and layered with some scallop circles created for the border of my circle.
 Just loving tags lately - they add to the whole rustic feel to the page and are super quick and easy to create using scraps of leftover papers.
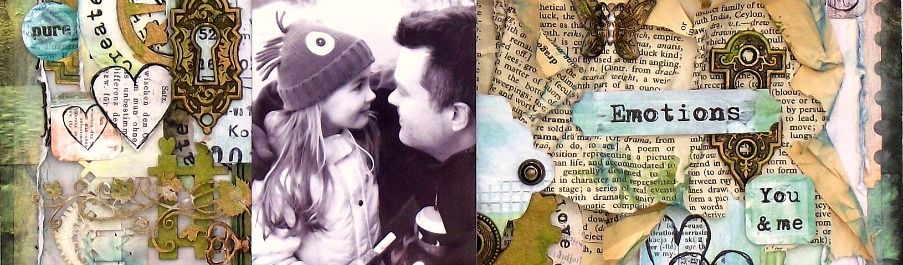
 My last layout is very simple but I wanted the photo to stand out so I kept the embellishments to a minimum and the tones very plain. I love the finished look. My father and daughter at the beach last month. They had so much fun exploring - love watching them together. (NOTE: I added the mini doily to this page from my stash)

 And lastly, my mini album. I had so much paper left over after my layouts that I wanted to change it up a little and create a different project. This mini was so fun to do - the only thing I added to the kit were the actual scallop mini album and the mini alphas.


 For the dressforms, I took apart another one of the flowers in the kit and used the tulle as a dress for my embellishment!


 Phew!! Well, I hope you adore this kit - I loved working with these papers so much - just beautiful (warning - I was totally covered in red sparkles afterwards - LOL!) I hope you all had a wonderful holiday - we're continuing with our festivities into the New Year. My husband's birthday is tonight, relatives come in on the 29th, my brother in law has his birthday on the 30th, New Year's on the 31st, my son's hockey tournament on the 2nd.... AHHHH! I need a holiday from my holiday.

 I'm only slightly addicted to banners as of late - LOVE them! For my banner here, I used some old fabric and cut out triangle shapes. I then layered with some of Bo Bunny's Newsprint ribbon (also cut into triangles). You can arrange on your page as desired. I love to layer mine or put one at the top and then one at the bottom for balance.
 I also love making my own tags - super easy and a great way to embellish 'boy' layouts. For these tags, I simply cut a 'tag' shape out from patterned paper, roughed up the edges a little and then did some faux stitching around the outer rim. To complete, I layered with another piece of patterned paper and cut out a cardstock sticker for the journaling.
 The branches are so very easy to work with and can be bent and shaped to your desired position. I required very little in addition to these embellishments as they were so lush, overflowing with flowers and branches. To adhere to my project I simply used a generous amount of Tacky Glue.
 I wanted to show the versatility of these blooms so I paired with non-traditional colours of blues and creams which really hilighted the coolness in this project.
Petaloo Products Used:
Canterbury Collection Magnolia & Berries, Cream
Canterbury Collection Magnolia Blossoms, Cream
Canterbury Collection Mini Magnolia Spray, Cream/Brown
Thanks for stopping by today!

 Hello! Welcome to my blog. My name is Tara and I am a wife and mother to 3 beautiful children who are the heart and soul of my projects. I started scrapping in 2008 and loved it immediately. What a wonderful outlet to explore my love of crafting and photography. Thanks for stopping by.
 All content, including text, photographs and design work is Copyright © Tara Orr and is shared solely for personal inspiration and may not be copied for profit or gain in publications or contest submissions. Written permission is required. Thank you!


![]()


